
How to add a splash image to minimal mistakes
In this blog post I will show you how to add a simple splash image to your minimal mistakes blog. View my current splash page here.
We start with the most simple splash page and slowly add more and more elements. This tutorial is an extension of the excellent official documentation here.
Add splash image and call to action
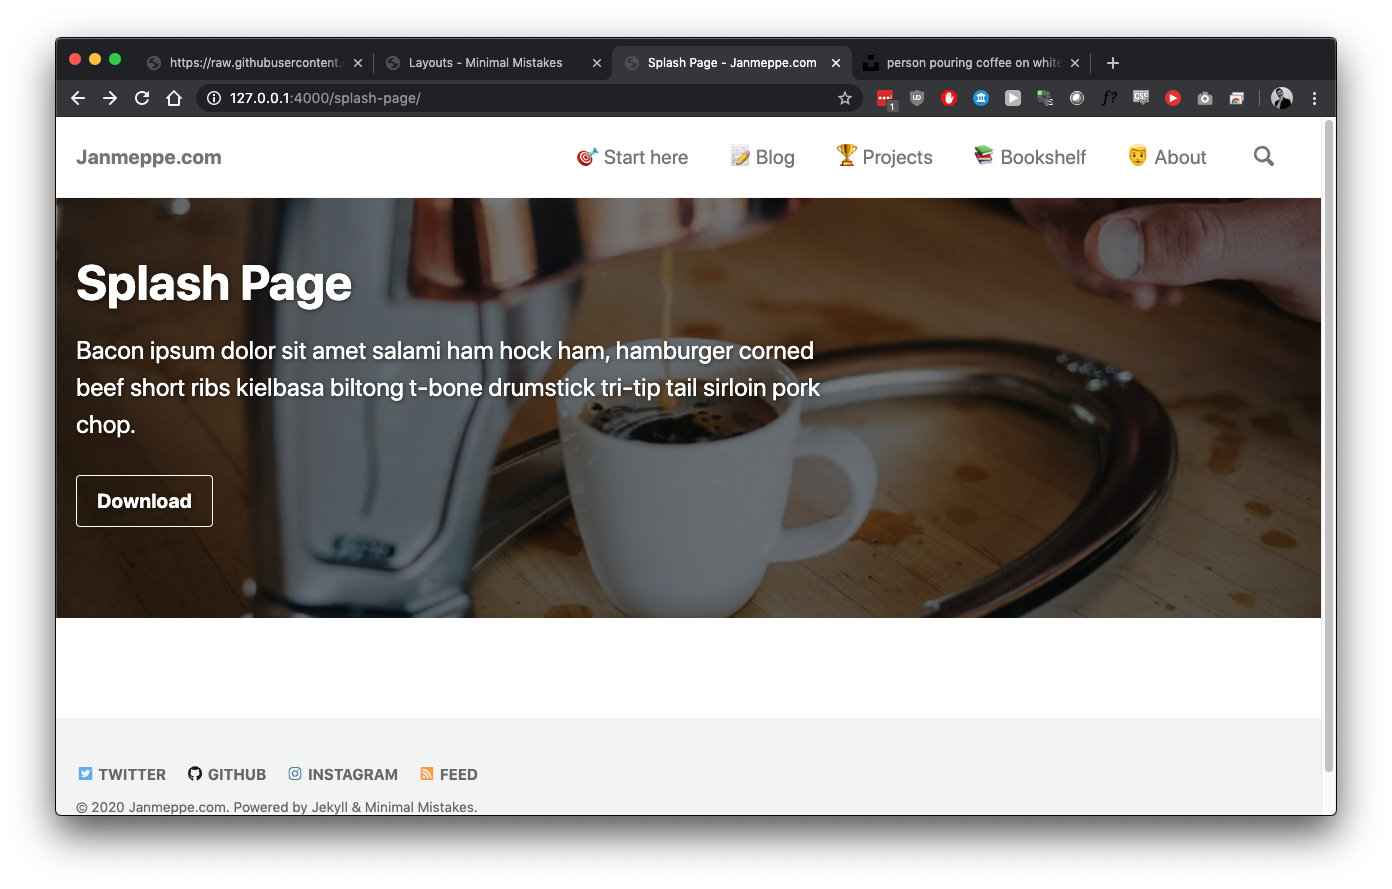
The splash page will look something like this.
- Create a new page
_pages/splash-page.md - Download this picture and save it as
assets/splash/coffee.jpg - Add the following front matter YAML to
_pages/splash-page.md
---
title: "Splash Page"
layout: splash
permalink: /splash-page/
header:
  overlay_color: "#000"
  overlay_filter: "0.5"
  overlay_image: /assets/splash/coffee.jpeg
  actions:
    - label: "Download"
      url: "#test-link"
excerpt: "Bacon ipsum dolor sit amet salami ham hock ham, hamburger corned beef short ribs kielbasa biltong t-bone drumstick tri-tip tail sirloin pork chop."
---
Add some intro text
Adding some intro text is easy and looks like this.
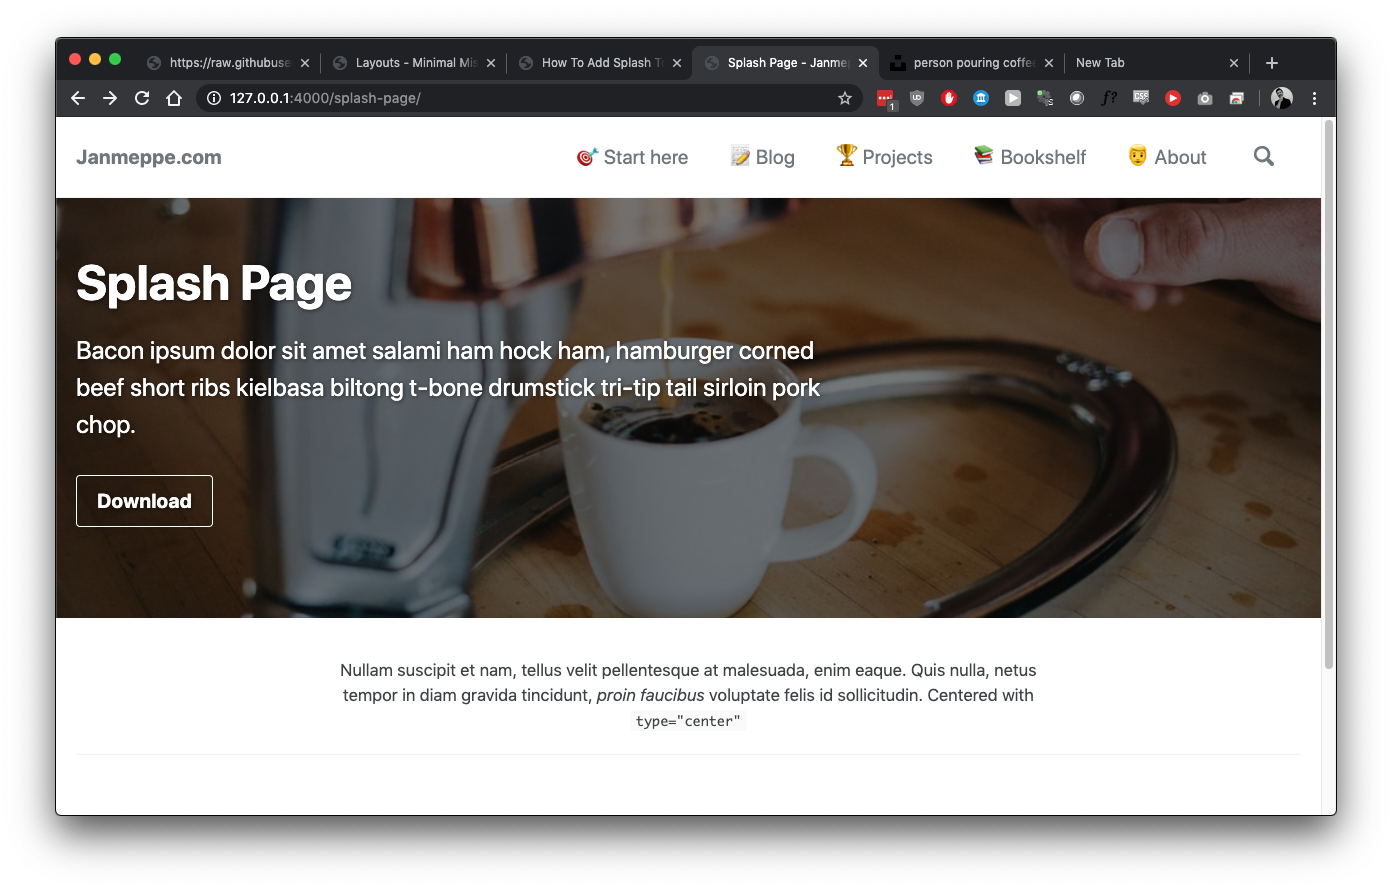
To get this result add this to your front matter YAML.
intro:
  - excerpt: 'Nullam suscipit et nam, tellus velit pellentesque at malesuada, enim eaque. Quis nulla, netus tempor in diam gravida tincidunt, *proin faucibus* voluptate felis id sollicitudin. Centered with `type="center"`'
And this to the body of your post.
{% include feature_row id="intro" type="center" %}
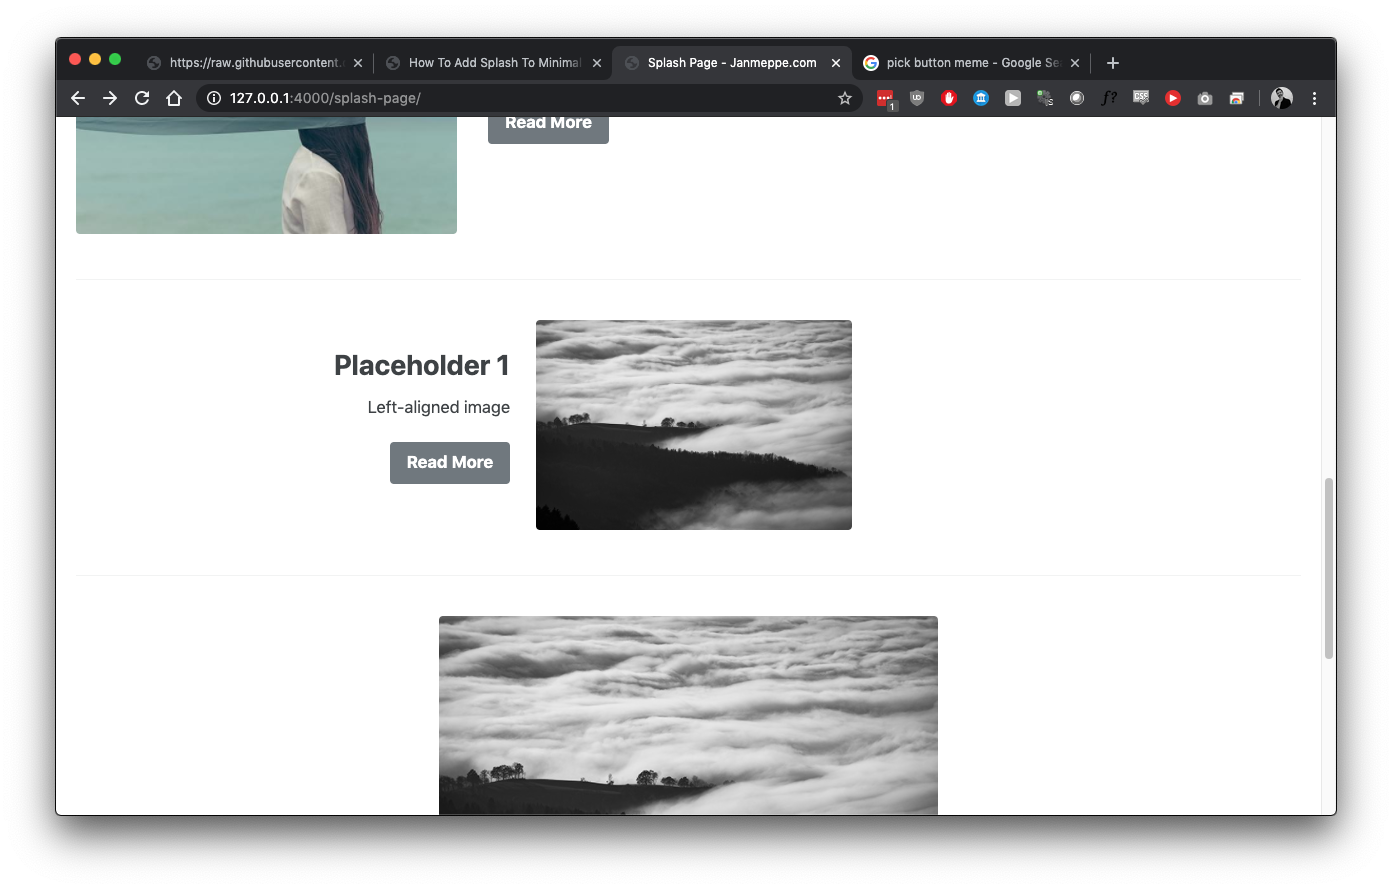
Add a feature row with 3 images
Adding a feature row with three images is easy.
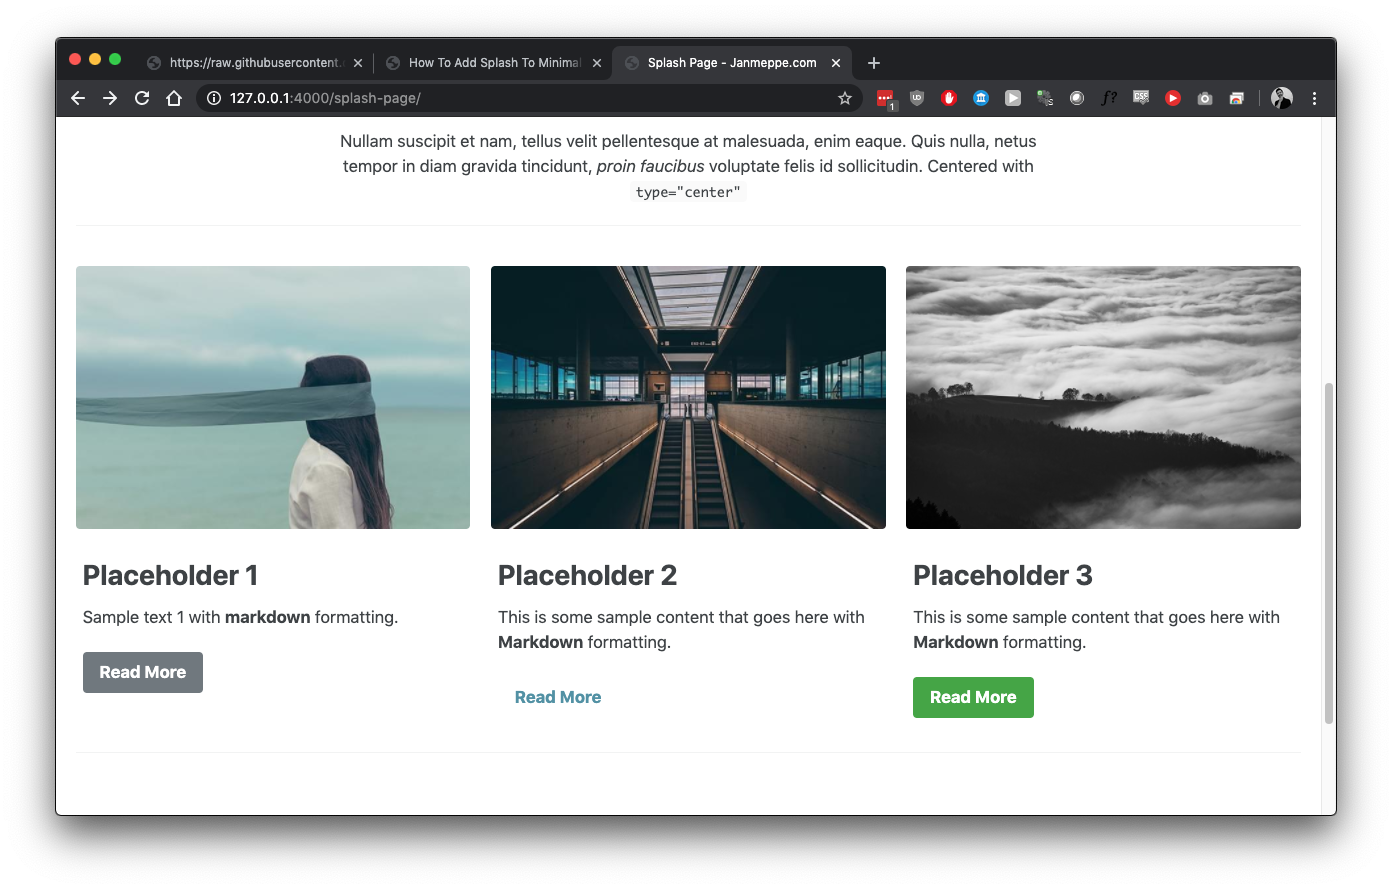
Save three images to /assets/splash/ (I named them feat1-1.jpg, feat1-2.jpg, and feat1-3.jpg). What we are going to do is to define a feature_row in the front matter and give the following attributes:
image_pathtitleexcerpturlbtn-labelbtn-class
So add this to your front matter.
feature_row:
  - image_path: /assets/splash/feat1-1.jpg
    title: "Placeholder 1"
    excerpt: "Sample text 1 with **markdown** formatting."
    url: "#test-link"
    btn_label: "Read More"
    btn_class: "btn--primary"
  - image_path: /assets/splash/feat1-2.jpg
    title: "Placeholder 2"
    excerpt: "This is some sample content that goes here with **Markdown** formatting."
    url: "#test-link"
    btn_label: "Read More"
    btn_class: "btn--secondar"
  - image_path: /assets/splash/feat1-3.jpg
    title: "Placeholder 3"
    excerpt: "This is some sample content that goes here with **Markdown** formatting."
    url: "#test-link"
    btn_label: "Read More"
    btn_class: "btn--primary"
And include this feature row in your the body of your page.
{% include feature_row %}
Add a left aligned image
Let’s add a left-aligned image.
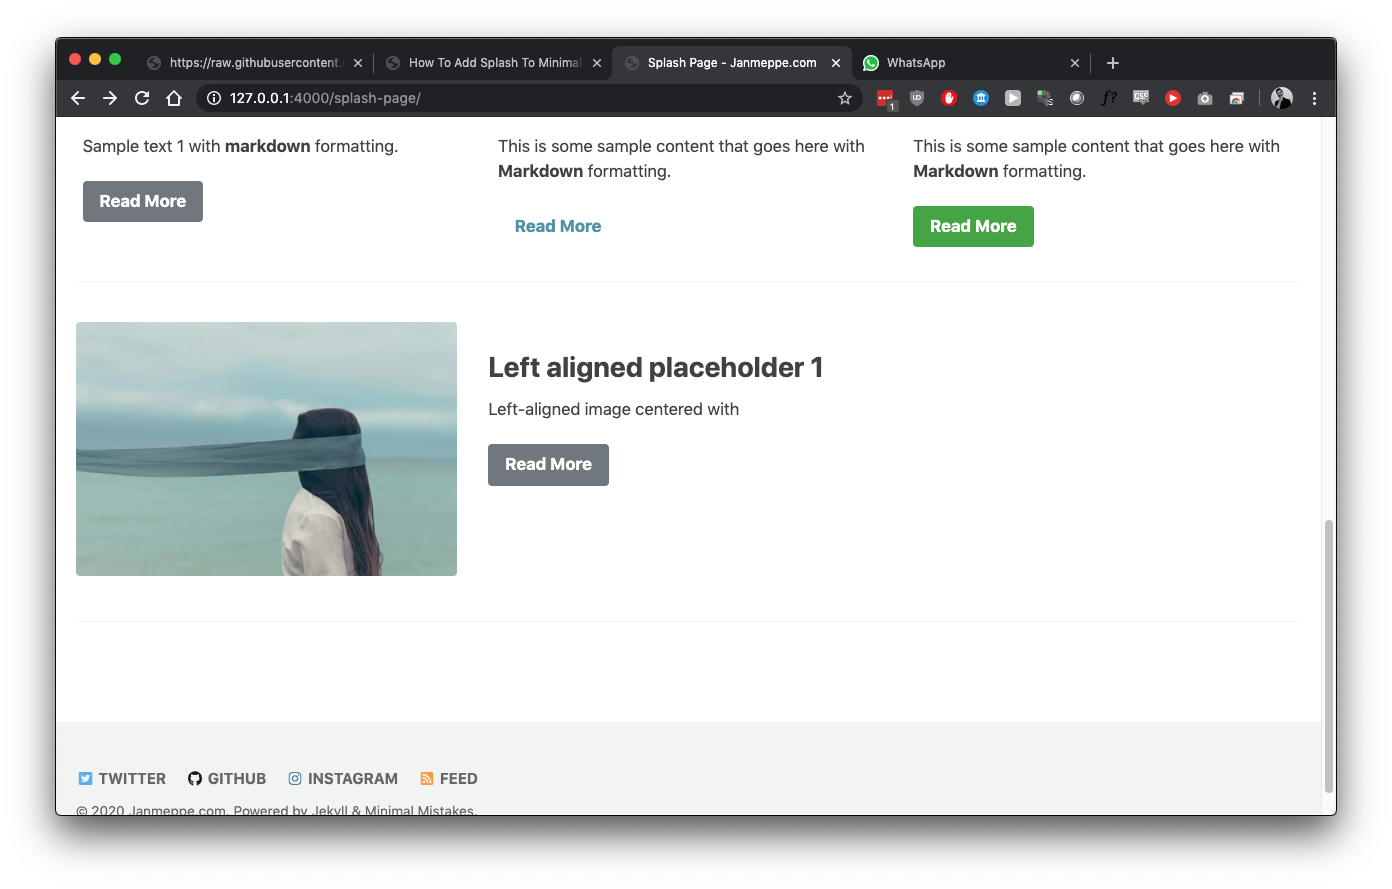
We can repeat this trick create a new feature_row_left
feature_row_left:
  - image_path: /assets/splash/feat1-1.jpg
    title: "Left aligned placeholder 1"
    excerpt: "Left-aligned image centered with"
    url: "#test-link"
    btn_label: "Read More"
    btn_class: "btn--primary"
And add another feature_row but with another id and type!
{% include feature_row id="feature_row_left" type="left" %}
Add a right aligned image
This is supposed to work for a right aligned image too. Add this to your
front matter YAML of your splash-page.md
feature_row_right:
  - image_path: /assets/splash/feat1-2.jpg
    title: "Placeholder 1"
    excerpt: "Right-aligned image with ``"
    url: "#test-link"
    btn_label: "Read More"
    btn_class: "btn--primary"
Add this in the body of your splash-page.md
{% include feature_row id="feature_row_right" type="right" %}
Which, for some reason, doesn’t work for me. For me even though we add
type=right it aligns to the center.
Conclusion
The complete front matter can be found here as a gist.
Adding a splash image in minimal mistakes is easy if you know how to do it.
We create a new page _pages/splash-page.md and populate it with some front
matter. We make use of the
feature_row
helper function and use templates to dynamically link images. That’s it! For
some reason I could not get the right-aligned image to work, but hopefully
you still learned something!

Comments